

Security Vulnerabilities in Kubernetes Pods and Hardening Techniques
Want to know how to bolster the security of Kubernetes pods? Here's a hands-on guide on their security vulnerabilities and how to take care of them.
Security vulnerabilities in Kubernetes Pods and hardening techniquesKubernetes, or K8s, are container orchestration platforms that can be used to automate the deployment of containerized applications. A typical Kubernetes cluster consists of nodes, pods, and a cluster plane. Nodes are the worker machines that run the applications.
Each cluster can have one or more nodes. Pods, on the other hand, are hosted on top of nodes, and these are components of the application workload. The cluster plane acts as a manager between nodes and pods in a cluster.These three basic components can be further broken down depending on their responsibilities. With the rise of Kubernetes, cyber attacks on Kubernetes clusters are also increasing. Here, pods act as a primary component where attacks can happen.
This is because container services run as root users. If a process has root access and it gets hacked, we give the entire system to the hacker. To implement cluster security, one way is to use hardening techniques.In this article, we will explore the security risks associated with pods and how hardening can help resolve the issue.
Security Vulnerabilities with Pods in K8s
To start off, create a GKE cluster using command line or Google Cloud console using the following command:
<pre class="codeWrap"><code>gcloud container clusters create my-cluster
--region us-central1
--zone us-central1-a </code></pre>
Check the status of the clustergcloud container clusters get-status my-cluster. Let’s check the installed Kubernetes version.
<pre class="codeWrap"><code>kubectl version</code></pre>
After this, you should run a Google Cloud-SDK pod:
<pre class="codeWrap"><code>kubectl run -it --rm gcloud --image=google/cloud-sdk:latest --restart=Never -- bash</code></pre>
The bash shell should now be installed within the pod container:
<pre class="codeWrap"><code>root@gcloud:/#</code></pre>
This can take a few seconds, but if a command prompt doesn't show up, just press Enter.
The Compute Metadata Endpoint
Without a custom metadata endpoint an attacker can easily get access to user credentials. Let’s access the V1 commute metadata endpoint using the following command:
<pre class="codeWrap"><code>root@gcloud:/# curl -s http://metadata.google.internal/computeMetadata/v1/instance/name</code></pre>
Output:
<pre class="codeWrap"><code>……
Your client does not have permission to get URL /computeMetadata/v1/instance/name from this server. Missing Metadata-Flavor:Google header
.……</code></pre>
Notice that it requires a custom header. Now add the custom header with the same command:
<pre class="codeWrap"><code>root@gcloud:/# curl -s -H "Metadata-Flavor: Google" http://metadata.google.internal/computeMetadata/v1/instance/name</code></pre>
Output
<pre class="codeWrap"><code>gke-simplecluster-default-pool-b57a043a-6z5v</code></pre>
This time it returns the name of the computer engine endpoint which is a security threat.
To find out the vulnerabilities inside a GKE node we need to look at its associated attributes. For this, we will be running the following commands from inside the GKE cluster.
<pre class="codeWrap"><code>root@gcloud:/# curl -s -H "Metadata-Flavor: Google" http://metadata.google.internal/computeMetadata/v1/instance/attributes/kube-env</code></pre>
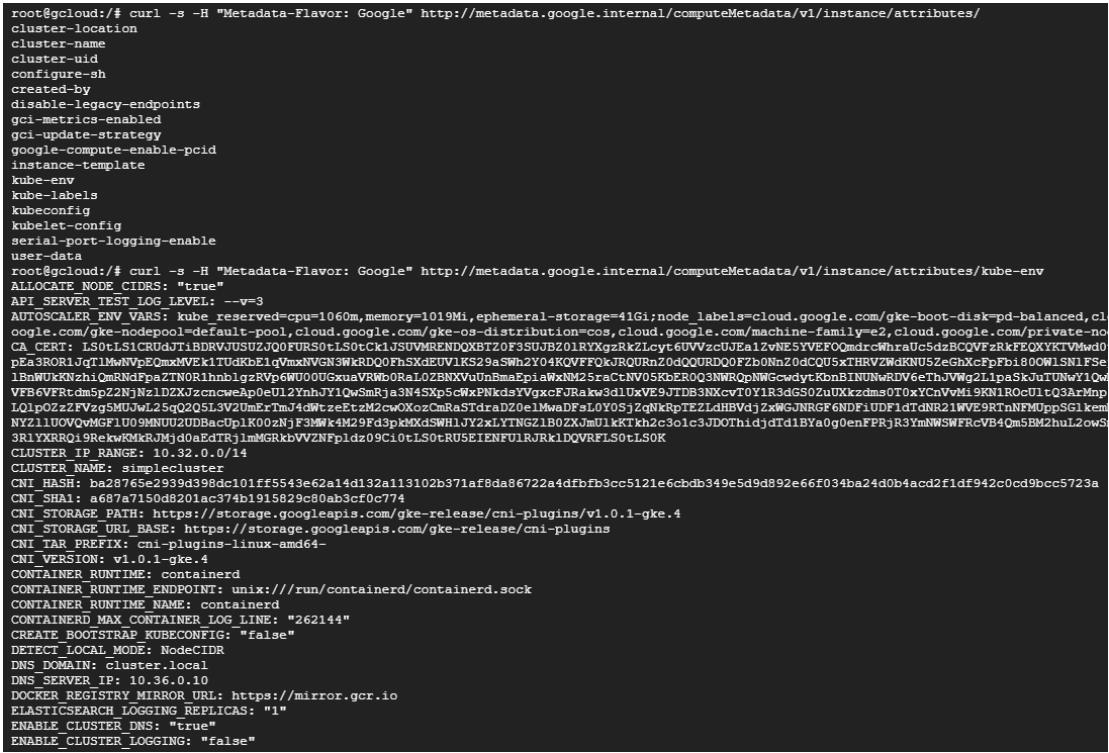
According to this output, the server-side request forgery can cause attacks in pod applications. Also, all users have access to create and execute pods, this gives them additional access to the file system. Moreover, the library vulnerabilities are also highlighted that can lead to remote code execution. The service account attached to the nodes determines the access rights of applications on the node.
Leverage the Permissions Assigned
Let’s check the OAuth scopes of this service account for this particular pod. To list down the scope use the following curl command:
<pre class="codeWrap"><code>root@gcloud:/# curl -s -H "Metadata-Flavor: Google" http://metadata.google.internal/computeMetadata/v1/instance/service-accounts/default/scopes</code></pre>
The output lists all the scopes given to this Pod.
<pre class="codeWrap"><code>https://www.googleapis.com/auth/devstorage.read_only
https://www.googleapis.com/auth/logging.write
https://www.googleapis.com/auth/monitoring
https://www.googleapis.com/auth/service.management.readonly
https://www.googleapis.com/auth/servicecontrol
https://www.googleapis.com/auth/trace.append
</code></pre>
Let’s break down the scope of each permission:
- https://www.googleapis.com/auth/devstorage.read_only: This gives read only access to Google Cloud storage.
- https://www.googleapis.com/auth/logging.write: Provides access to Google Cloud logging
- https://www.googleapis.com/auth/monitoring: Allows to access monitoring data from Google Cloud projects
- https://www.googleapis.com/auth/service.management.readonly: Enables to read data from Google Cloud Service Management API, which provides information about Google Cloud services.
- https://www.googleapis.com/auth/servicecontrol: Enables to use of Google Cloud Service Control API, which allows applications to be authorized to use Google Cloud services.
- https://www.googleapis.com/auth/trace.append:Allows the service account to write traces to the Google Cloud Trace service, which tracks the execution of Google Cloud applications.These editor permissions are a serious security threat and it means that any pod on the node’s pool can access secret information.
Let’s see how we can create a pod on the host file system and the security risks associated with it. Create a pod that mounts the underlying filesystem at root inside the container:
<pre class="codeWrap"><code>cat <<EOF | kubectl apply -f -apiVersio v1
kind: Pod
metadata:
name: hostpath
spec:
containers:
name: hostpath
image: google/cloud-sdk:latest
command: ["/bin/bash"]
args: ["-c", "tail -f /dev/null"]
volumeMounts:
mountPath: /rootfs
name: rootfs
volumes:
name: rootfs
hostPath:
path:
/EOF</code></pre>
Now, you should run to obtain a shell inside your newly created pod:
<pre class="codeWrap"><code>kubectl exec -it hostpath -- bash</code></pre>
To make further work viable, switch the pod's shell root filesystem to the system of the underlying host:
<pre class="codeWrap"><code>chroot /rootfs /bin/bash</code></pre>
This gives you the permission to perform all root operations on this pod, and the pod is now pretty much a root shell on the node. You can now list the docker images, run a privileged container, and exec to the running container.
Once you have everything you need, delete the hostpath pod:
<pre class="codeWrap"><code>kubectl delete pod hostpath</code></pre>
So far we have discussed what are the possible security threats associated with the pods, but let's see how to amend them.
Hardening the Pods
After going through all the possible security risks on pods let’s explore how we can use hardening techniques to come up with a secure solution. Create a second node on the cluster with a legacy endpoint disabled and enable metadata concealment.
<pre class="codeWrap"><code>gcloud beta container node-pools create second-pool --cluster=simplecluster --zone=$MY_ZONE --num-nodes=1 --metadata=disable-legacy-endpoints=true --workload-metadata-from-node=SECURE</code></pre>
In Cloud Shell, launch a single instance of the Google Cloud-SDK container that will be run only on the second node pool with the protections enabled and not run as the root user.
<pre class="codeWrap"><code>kubectl run -it --rm gcloud --image=google/cloud-sdk:latest --restart=Never --overrides='{ "apiVersion": "v1", "spec": { "securityContext": { "runAsUser": 65534, "fsGroup": 65534 }, "nodeSelector": { "cloud.google.com/gke-nodepool": "second-pool" } } }' -- bash</code></pre>
Output:
<pre class="codeWrap"><code>nobody@gcloud:/$</code></pre>
This could take a few seconds, so be patient.
Blocked Endpoints
When we conifugred the second pool to --workload-metadata-from-node=SECURE, the command to retrive the sensitive file, will now fail:
<pre class="codeWrap"><code>nobody@gcloud:/$ curl -s -H "Metadata-Flavor: Google" http://metadata.google.internal/computeMetadata/v1/instance/attributes/kube-env</code></pre>
Output:
<pre class="codeWrap"><code>This metadata endpoint is concealed.</code></pre>
While, the previous command had failed, other commands to non-sensitive endpoints will not. So, that's a first problem solved.
PodSecurityPolicy Objects
In order to have the Pods security policy we need to grant necessary permissions to users to proceed and enable cluster-admin permissions to your user account.
<pre class="codeWrap"><code>kubectl create clusterrolebinding clusteradmin --clusterrole=cluster-admin --user="$(gcloud config list account --format 'value(core.account)')"</code></pre>
Output:
<pre class="codeWrap"><code>clusterrolebinding.rbac.authorization.k8s.io/clusteradmin created</code></pre>
Next, use the following commands to enable PodSecurityPolicy on all authenticated users in the default namespace and add ClusterRole to provide permissions to use this specific PodSecurityPolicy.
<pre class="codeWrap"><code>cat <<EOF | kubectl apply -f -
apiVersion: policy/v1beta1
kind: PodSecurityPolicy
metadata:
name: restrictive-psp
annotations:
seccomp.security.alpha.kubernetes.io/allowedProfileNames: 'docker/default'
apparmor.security.beta.kubernetes.io/allowedProfileNames: 'runtime/default'
seccomp.security.alpha.kubernetes.io/defaultProfileName: 'docker/default'
apparmor.security.beta.kubernetes.io/defaultProfileName: 'runtime/default'
spec:
privileged: false
# Required to prevent escalations to root.
allowPrivilegeEscalation: false
# This is redundant with non-root + disallow privilege escalation,
# but we can provide it for defense in depth.
requiredDropCapabilities:
- ALL
# Allow core volume types.
volumes:
- 'configMap'
- 'emptyDir'
- 'projected'
- 'secret'
- 'downwardAPI'
# Assume that persistentVolumes set up by the cluster admin are safe to use.
- 'persistentVolumeClaim'
hostNetwork: false
hostIPC: false
hostPID: false
runAsUser:
# Require the container to run without root privileges.
rule: 'MustRunAsNonRoot'
seLinux:
# This policy assumes the nodes are using AppArmor rather than SELinux.
rule: 'RunAsAny'
supplementalGroups:
rule: 'MustRunAs'
ranges:
# Forbid adding the root group.
- min: 1
max: 65535
fsGroup:
rule: 'MustRunAs'
ranges:
# Forbid adding the root group.
- min: 1
max: 65535
EOF
</code></pre>
Output:
<pre class="codeWrap"><code>podsecuritypolicy.extensions/restrictive-psp created</code></pre>
Now, let's add dd the ClusterRole that gives the option to use this PodSecurityPolicy:
<pre class="codeWrap"><code>cat <<EOF | kubectl apply -f -
kind: ClusterRole
apiVersion: rbac.authorization.k8s.io/v1
metadata:
name: restrictive-psp
rules:
- apiGroups: extensions
resources: podsecuritypolicies
resourceNames: restrictive-psp
verbs: use
EOF
</code></pre>
As a final step create RoleBinding in the default namespace. It’s going to allow authenticated users to use PodSecurityPolicy and then you can enable the admission controller.
<pre class="codeWrap"><code>cat <<EOF | kubectl apply -f -
All service accounts in kube-system
can 'use' the 'permissive-psp' PSP
apiVersion: rbac.authorization.k8s.io/v1
kind: RoleBinding
metadata:
name: restrictive-psp
namespace: default
roleRef:
- apiGroup: rbac.authorization.k8s.io
kind: ClusterRole
name: restrictive-psp
subjects:
- apiGroup: rbac.authorization.k8s.io
kind: Group
name: system:authenticated
EOF
</code></pre>
PodSecurity Policy
Let's enable the admission controller:
<pre class="codeWrap"><code>gcloud beta container clusters update simplecluster --zone $MY_ZONE --enable-pod-security-policy </code></pre>
A Blocked Pod Mounting the Host Filesystem
In order to validate the PodSecurityPolicies let’s create another user account that can interact with the cluster.
<pre class="codeWrap"><code>gcloud iam service-accounts create demo-developerCode to authenticate the user </code></pre>
Run, the following command to grant the aforementioned permissions to the service accounts:
<pre class="codeWrap"><code>MYPROJECT=$(gcloud config list --format 'value(core.project)')
gcloud projects add-iam-policy-binding "${MYPROJECT}" --role=roles/container.developer --member="serviceAccount:demo-developer@${MYPROJECT}.iam.gserviceaccount.com"</code></pre>
Get the credentials:
<pre class="codeWrap"><code>gcloud iam service-accounts keys create key.json --iam-account "demo-developer@${MYPROJECT}.iam.gserviceaccount.com"</code></pre>
Authenticate the credentials:
<pre class="codeWrap"><code>gcloud auth activate-service-account --key-file=key.json</code></pre>
You should also configure kubectl to use the credentials when in communication with the cluster:
<pre class="codeWrap"><code>gcloud container clusters get-credentials simplecluster --zone $MY_ZONE</code></pre>
Now create a pod that mounts the underlying host filesystem at the folder name in the container.
<pre class="codeWrap"><code>cat <<EOF | kubectl apply -f -
apiVersion: v1
kind: Pod
metadata:
name: hostpath
spec:
containers:
- name: hostpath
image: google/cloud-sdk:latest
command: ["/bin/bash"]
args: ["-c", "tail -f /dev/null"]
volumeMounts:
mountPath: /rootfs
- name: rootfs
- volumes:
- name: rootfs
hostPath:
path: /
EOF
</code></pre>
Once, that's done create another pod to meet the criteria for the restrictive-psp.
<pre class="codeWrap"><code>cat <<EOF | kubectl apply -f -
apiVersion: v1
kind: Pod
metadata:
name: hostpath
spec:
securityContext:
runAsUser: 1000
fsGroup: 2000
containers:
- name: hostpath
image: google/cloud-sdk:latest
command: ["/bin/bash"]
args: ["-c", "tail -f /dev/null"]
EOF
</code></pre>
You can also use Pod Security Admission or a third-party admission plugin, that you can deploy and configure yourself to enable such restrictions. I hope this article will provide enough information to set up secure pods for your K8 clusters in the future.


Facing Challenges in Cloud, DevOps, or Security?
Let’s tackle them together!
get free consultation sessions
We will contact you shortly.
