
Setup P2S Azure VPN with the integration of Azure AD SSO
Delve into a simple guide on integrating Azure AD Single Sign-On (SSO) with P2S Azure VPN. Enhance secure access and streamline user authentication with this straightforward setup.
In this tutorial, we will set up a P2S Azure VPN connection within our VNet. We will deploy the Azure Virtual network gateway and consider you have VNet created. If you don’t have a virtual network deployed, you can follow this documentation to do so https://learn.microsoft.com/en-us/azure/virtual-network/quick-create-portal
These are steps that are going to be covered in this tutorial for successfully deploying P2S Azure VPN with the integration of Azure AD SSO:
- Deploy Virtual network gateway
- Configure Virtual network gateway
- Test everything
Deploy Virtual network gateway
Search for Virtual network gateways and click “Create”


For the “SKU” option, you need to choose one of the following options, otherwise, your VPN won’t work: “VpnGw1”, “VpnGw2”, “VpnGw3”, “VpnGw4” or “VpnGw5”. Other variables you can populate upon your preferences and other settings you can leave the default.
Disclaimer: it takes around 45 minutes for the Virtual network gateway to be deployed
Configure Virtual network gateway
Once your Virtual network gateway is deployed, you need to configure it in order to have a properly working Azure AD SSO within your VNet. It contains 2 important parts:
- Authorize the Azure VPN application
- Configure Point-to-site configuration
1. Authorize the Azure VPN application
- Sign in to the Azure portal as a user that is assigned the Global administrator role.
- Next, grant admin consent for your organization. This allows the Azure VPN application to sign in and read user profiles. Copy and paste the URL that pertains to your deployment location in the address bar of your browser:
Public (You will probably use this)
Azure Governmenthttps://login.microsoftonline.com/common/oauth2/authorize?client_id=41b23e61-6c1e-4545-b367-cd054e0ed4b4&response_type=code&redirect_uri=https://portal.azure.com&nonce=1234&prompt=admin_consent
Microsoft Cloud Germanyhttps://login.microsoftonline.us/common/oauth2/authorize?client_id=51bb15d4-3a4f-4ebf-9dca-40096fe32426&response_type=code&redirect_uri=https://portal.azure.us&nonce=1234&prompt=admin_consent
Azure China 21Vianethttps://login-us.microsoftonline.de/common/oauth2/authorize?client_id=538ee9e6-310a-468d-afef-ea97365856a9&response_type=code&redirect_uri=https://portal.microsoftazure.de&nonce=1234&prompt=admin_consenthttps://login.chinacloudapi.cn/common/oauth2/authorize?client_id=49f817b6-84ae-4cc0-928c-73f27289b3aa&response_type=code&redirect_uri=https://portal.azure.cn&nonce=1234&prompt=admin_consent - Select the account that has the Global administrator role if prompted.
- On the Permissions requested page, select Accept.
- Go to Azure Active Directory. In the left pane, click Enterprise Applications. You'll see Azure VPN listed.

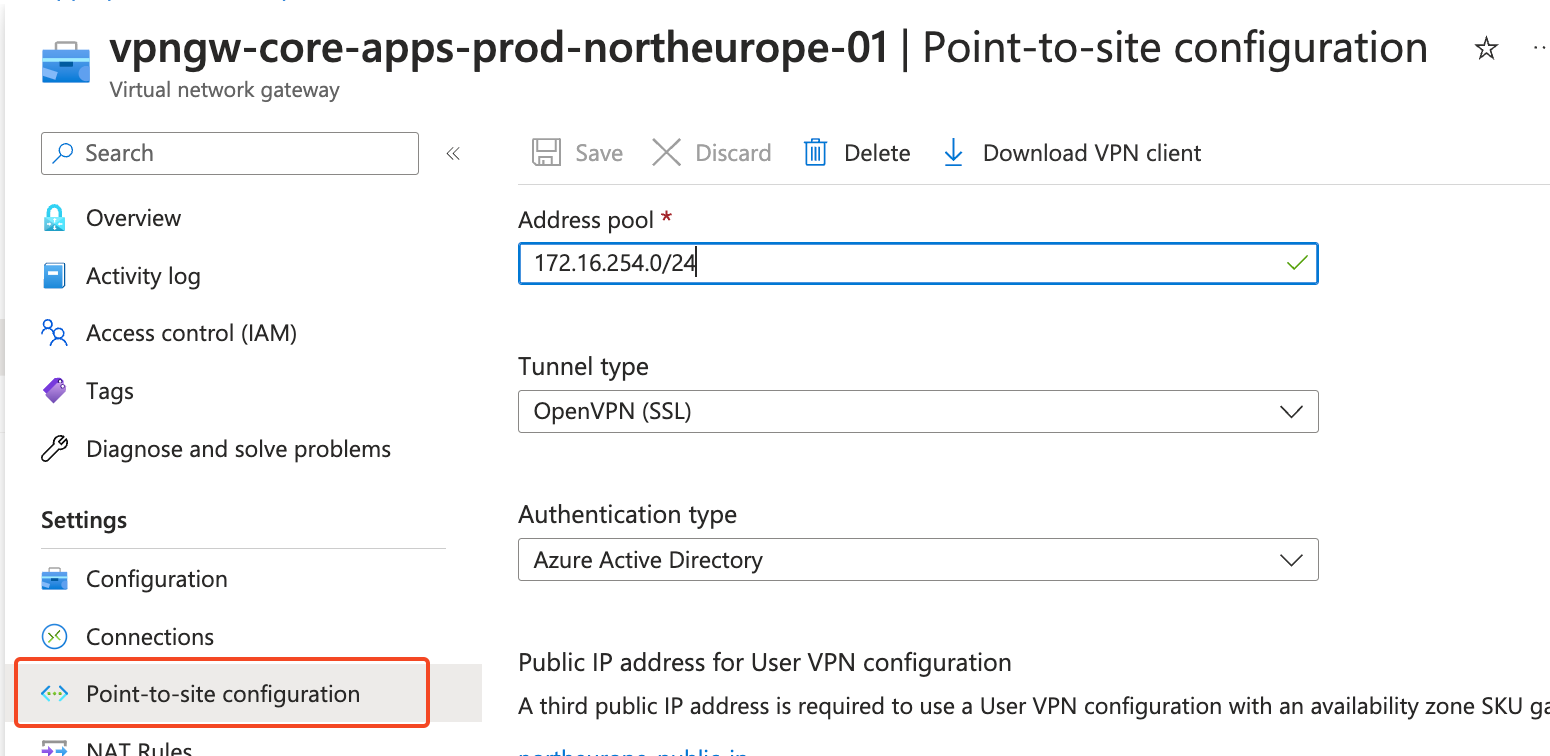
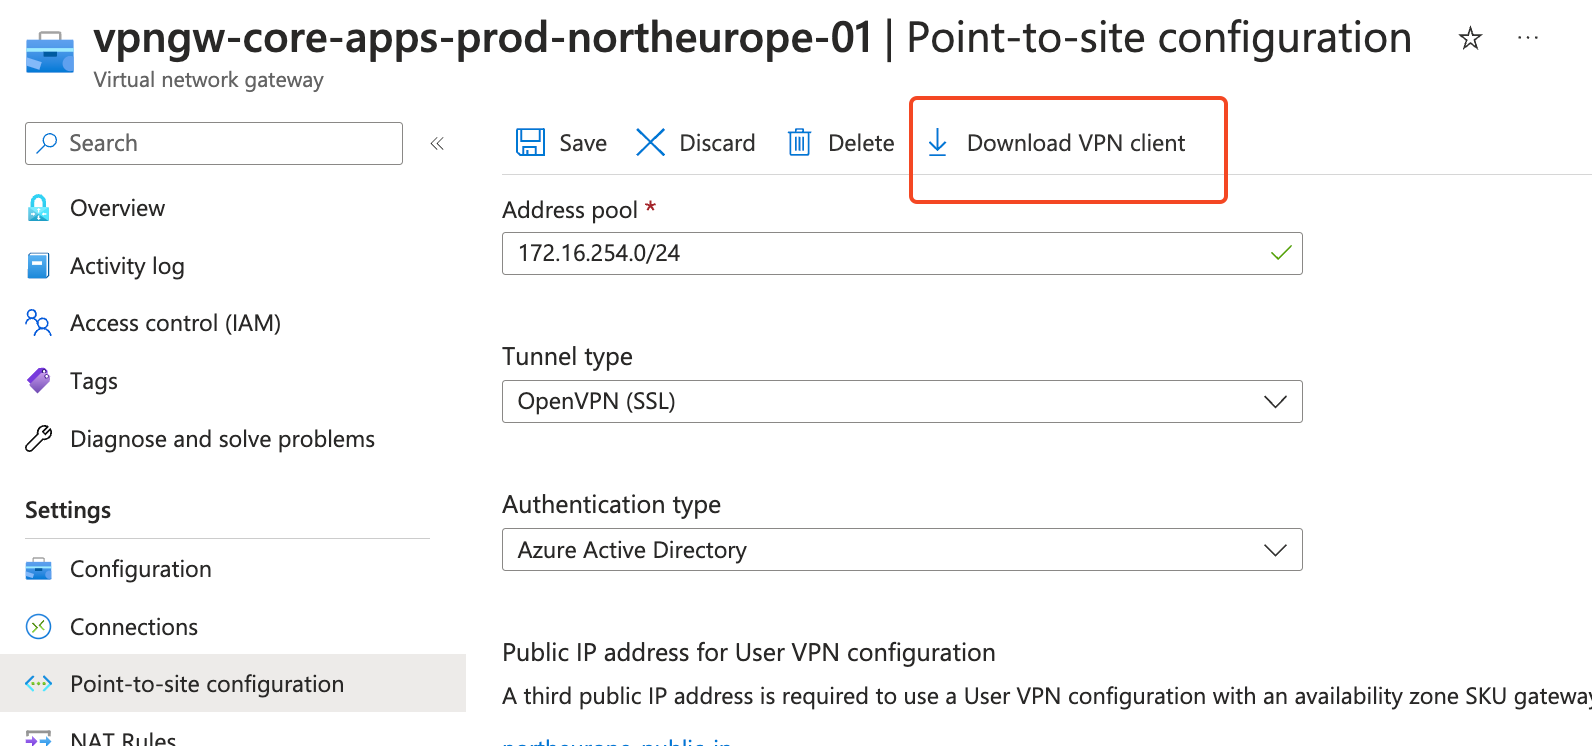
2. Configure Point-to-site configuration
Go to your Virtual network gateway resource and click “Point-to-site configuration”
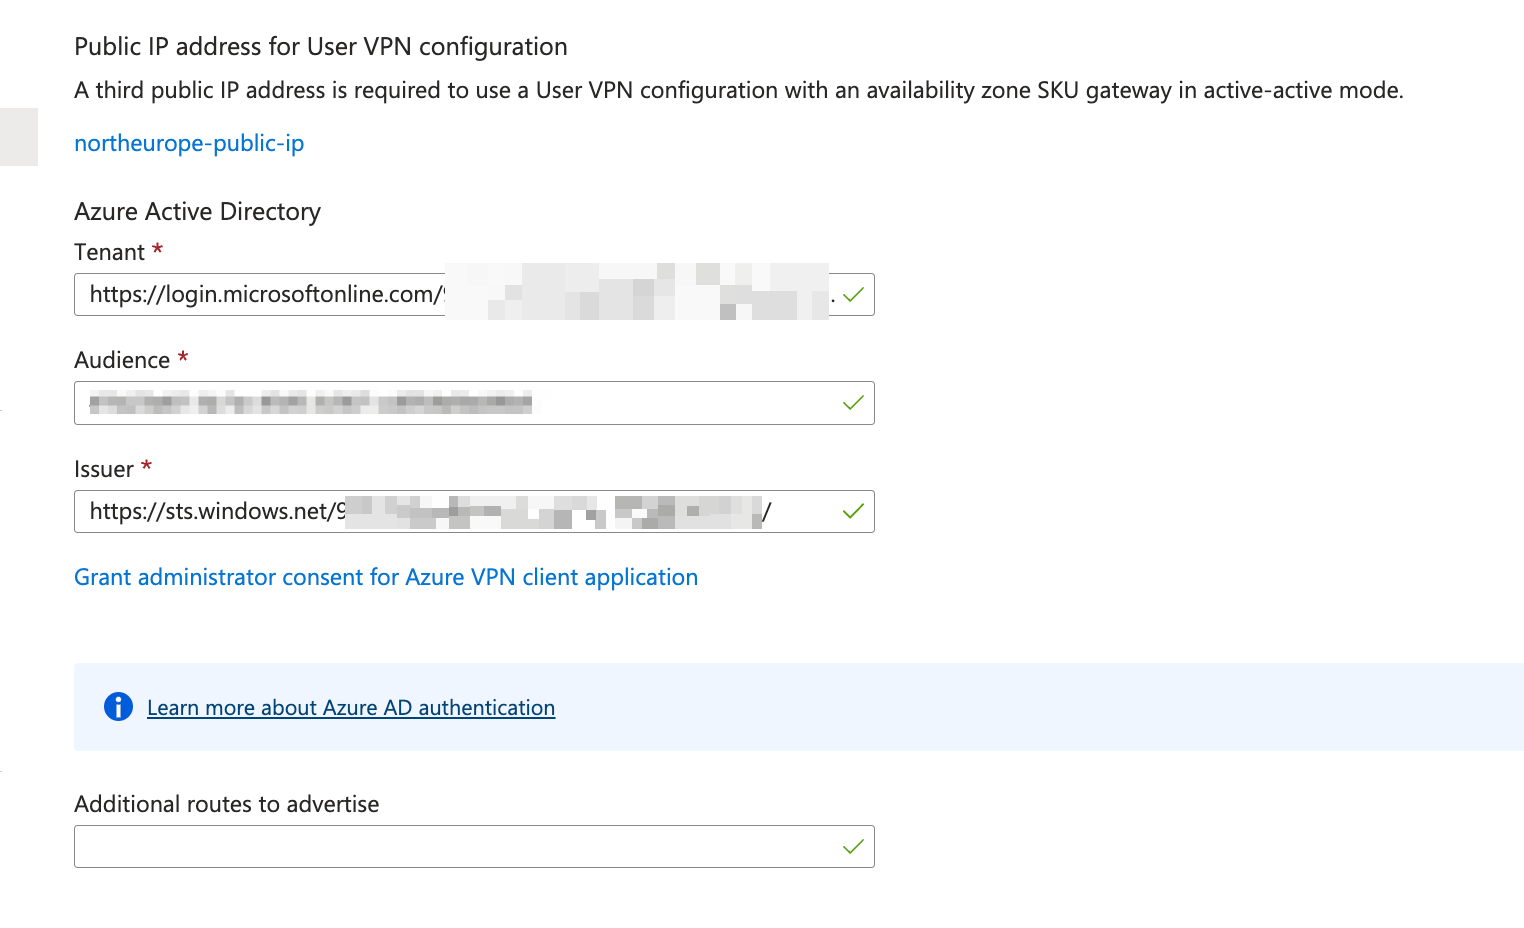
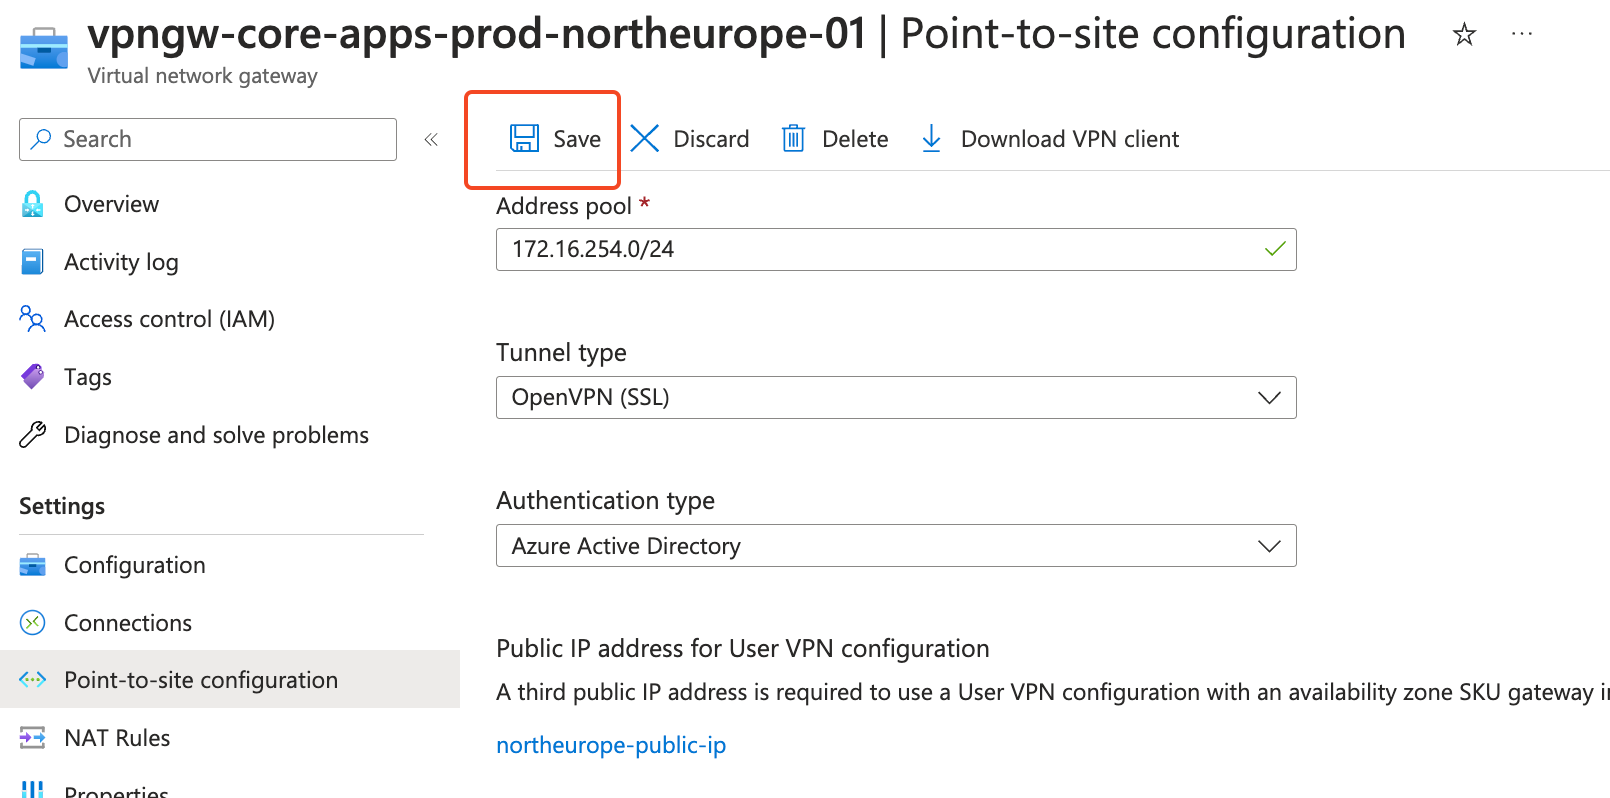
After successfully populating variables, click “Save”. Keep in mind this process will take around 15 minutes.
Test everything
You need to download the VPN client file, download the Azure VPN client and connect with the Azure VPN client.
You can download the VPN client file by following the steps:
- go to your Virtual network gateway resource
- “Point-to-site configuration”
- “Download VPN client”
After that, download the Azure VPN client and connect to the network.
- For MacOS - follow this documentation https://learn.microsoft.com/en-us/azure/vpn-gateway/openvpn-azure-ad-client-mac
- For Windows - follow this documentation https://learn.microsoft.com/en-us/azure/vpn-gateway/openvpn-azure-ad-client
Useful links
- https://learn.microsoft.com/en-us/azure/vpn-gateway/vpn-gateway-howto-point-to-site-resource-manager-portal
- https://learn.microsoft.com/en-us/azure/vpn-gateway/point-to-site-about
- https://learn.microsoft.com/en-us/azure/vpn-gateway/openvpn-azure-ad-client
- https://learn.microsoft.com/en-us/azure/virtual-network/quick-create-portal
- https://learn.microsoft.com/en-us/azure/vpn-gateway/vpn-gateway-about-vpngateways
- https://learn.microsoft.com/en-us/azure/vpn-gateway/openvpn-azure-ad-tenant
- https://learn.microsoft.com/en-us/azure/active-directory/fundamentals/active-directory-how-to-find-tenant
- https://learn.microsoft.com/en-us/azure/active-directory/fundamentals/active-directory-access-create-new-tenant
- https://www.youtube.com/watch?v=Ur0WNjnXJrU


Facing Challenges in Cloud, DevOps, or Security?
Let’s tackle them together!
get free consultation sessions
We will contact you shortly.
